Have you ever seen a hairstyle that looks so pretty and effortless that you immediately thought, “I need to try this”? That’s exactly how I feel about the waterfall braid! It has that soft, romantic look that can instantly make your hairstyle stand out without looking like you spent hours getting ready.
Whether you’re dressing up for a special occasion or simply want to give your everyday hair a cute little upgrade, a waterfall braid is a beautiful choice. And don’t worry if you’re not great at braiding yet, you can absolutely learn this with a little practice.
In this guide, I’ll show you how to create a waterfall braid hairstyle step by step, along with simple tips to help you get that gorgeous, flowing finish without the stress.
What Hairstyle Is Called a Waterfall Braid?
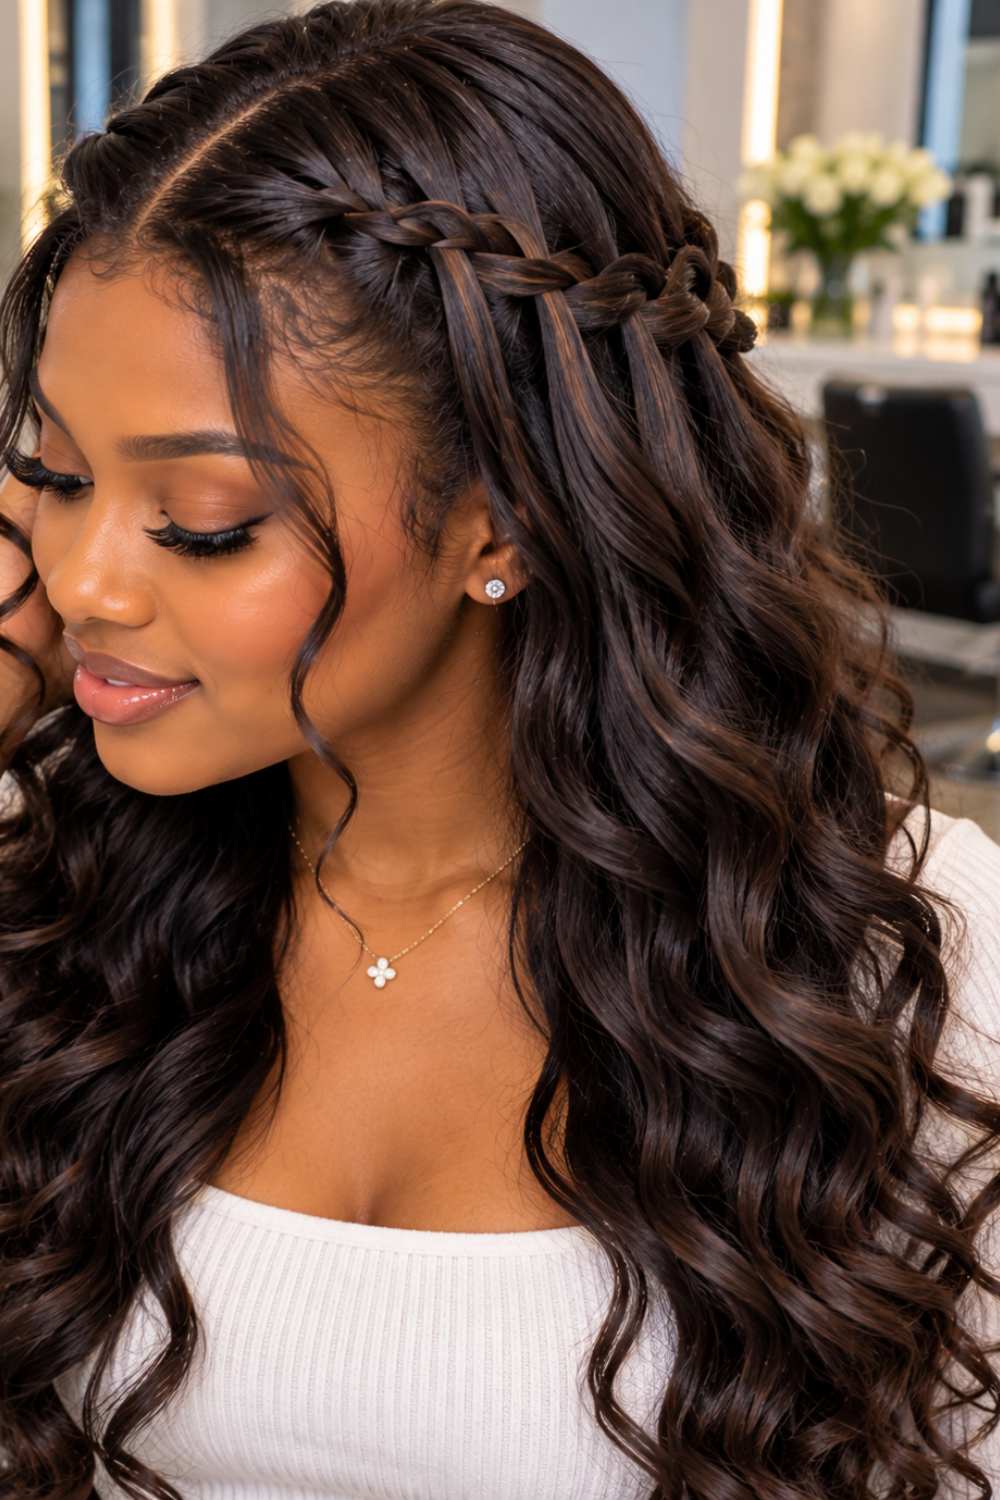
A waterfall braid is a beautiful braided hairstyle where sections of hair are woven together while some strands are intentionally left loose, creating a cascading effect that looks like a waterfall. Unlike a regular braid, the loose strands flow down naturally through the braid, giving the style a soft, romantic, and elegant appearance. It works especially well on medium to long hair and can be worn with straight, wavy, or curly hair.
What You Need to Create a Waterfall Braid
Before you start braiding, it helps to have everything you need within reach. The good news is that you don’t need a whole drawer of fancy hairstyling products to create a waterfall braid hairstyle that look beautiful. A few simple tools can make the process much easier and help your finished hairstyle look neat and polished.
Hairbrush or Wide-Tooth Comb
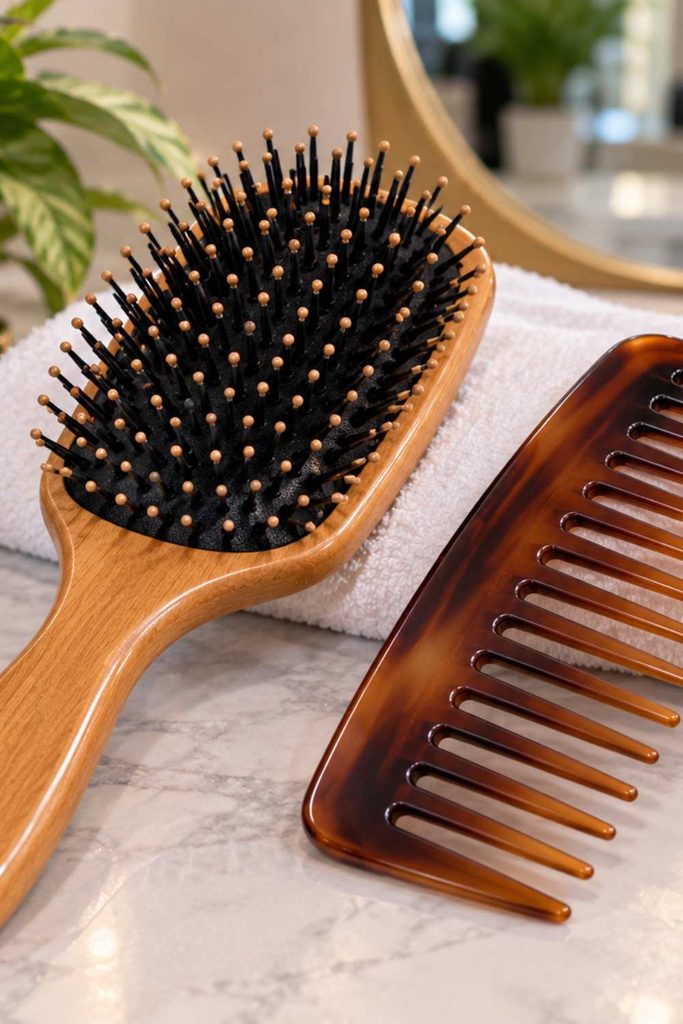
Start with hair that is smooth and free of tangles. A hairbrush works well for straight or wavy hair, while a wide-tooth comb is a great option if your hair is curly or prone to breakage. Gently detangle your hair from the ends and work your way upward so you don’t create a waterfall braid hairstyle that is unnecessary pulling.
Small Clear or Matching Hair Elastic
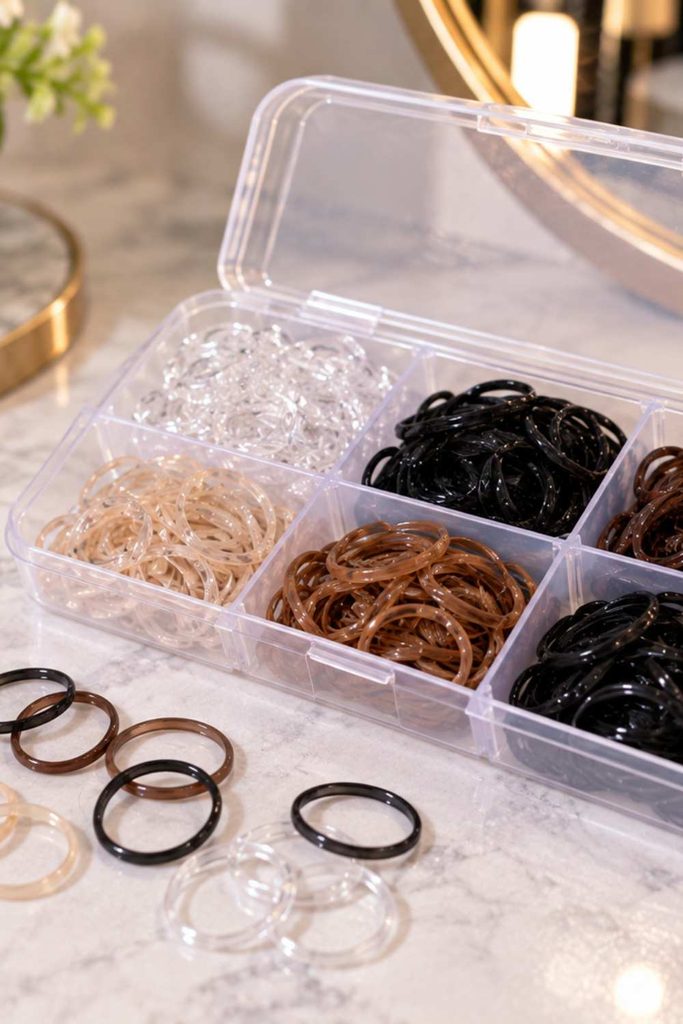
Once you reach the end of your braid, you’ll need something small to hold it securely in place. A clear elastic is perfect because it blends into your hair, but you can also choose an elastic that matches your hair color. The smaller and less noticeable it is, the easier it will be to keep the focus on your pretty braid.
Bobby Pins
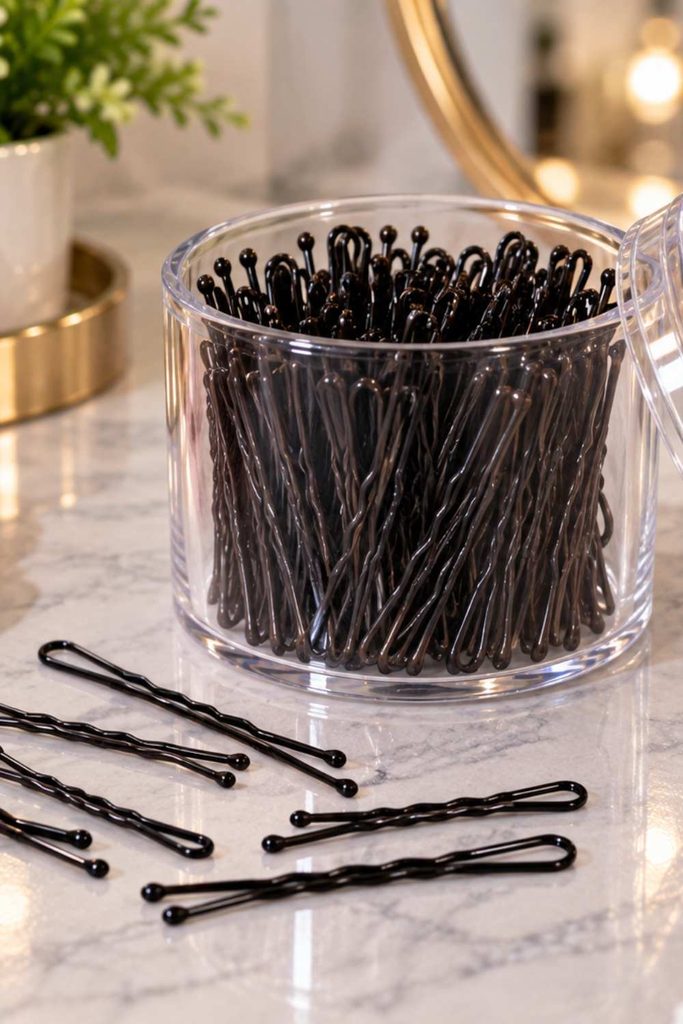
Don’t underestimate the power of a few bobby pins! They are especially useful for securing the end of you to create a waterfall braid hairstyle and keeping stray pieces in place. If you want a softer, more effortless look, use just enough pins to hold everything together without making the hairstyle feel too stiff.
Light Styling Cream or Hairspray
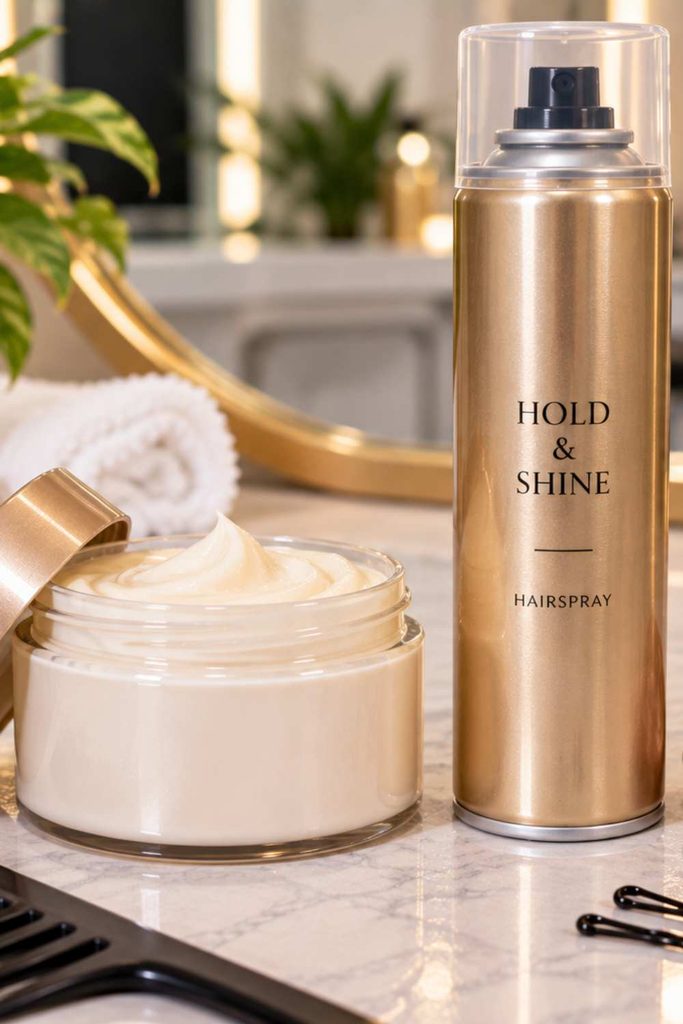
A little styling product can make a big difference. Use a small amount of lightweight styling cream to smooth frizz and make your hair easier to handle while braiding. Once you’re finished, a light mist of hairspray can help keep the braid in place. Just avoid using too much you still want those waterfall strands to look soft and natural when you create a waterfall braid hairstyle.
Curling Wand or Flat Iron for Extra Waves
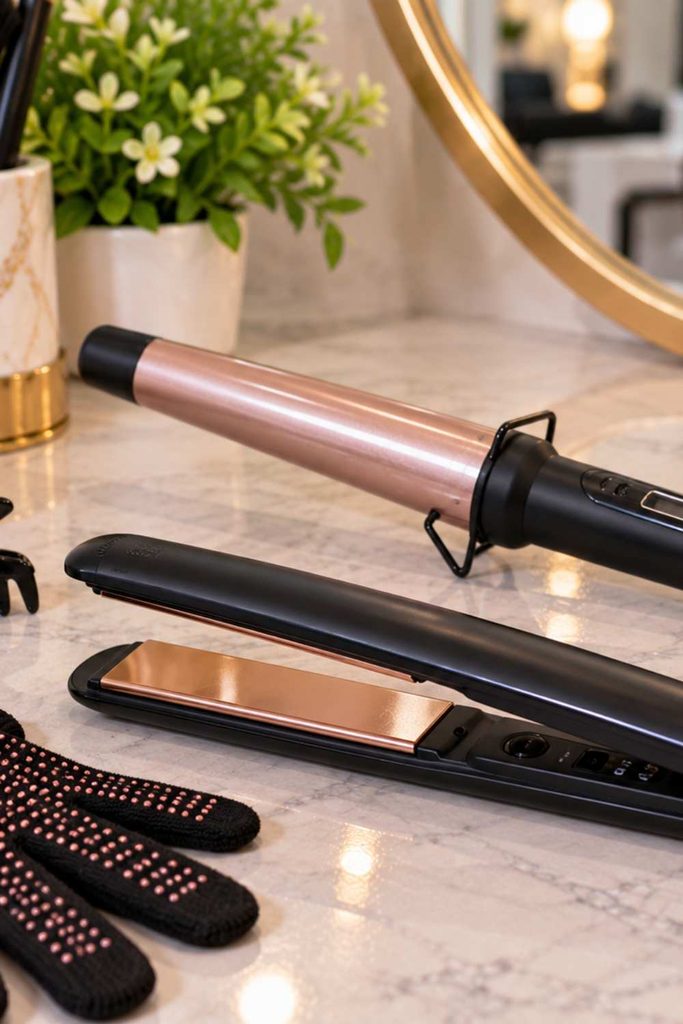
Want to create a waterfall braid hairstyle from pretty to absolutely gorgeous? Add some loose waves to the hair that falls beneath the braid. You can use a curling wand or flat iron to create soft, relaxed waves. This step is completely optional, but it gives the hairstyle that romantic, flowing finish that makes a waterfall braid so eye-catching.
How to Create a Waterfall Braid Hairstyle Step by Step
Choose Your Starting Point
Now that your hair is detangled and ready to go, it’s time to start to create a waterfall braid hairstyle. This part may feel a little tricky at first, but don’t overthink it. Once you get your three sections in place, the rest of the braid becomes much easier.
Start by taking a small section of hair near the front of your head, preferably around your temple or just above your ear. Divide this section into three fairly even pieces and hold one section between each finger so you can easily move them as you braid.
Try not to make the sections too thick or too tiny. Medium-sized sections are easier to control and will give your waterfall braid a neat, balanced appearance. Also, keep your grip gentle there’s no need to pull your hair tightly. A slightly relaxed starting point will help you achieve that soft, effortless waterfall effect you’re looking for.
Begin the Braid
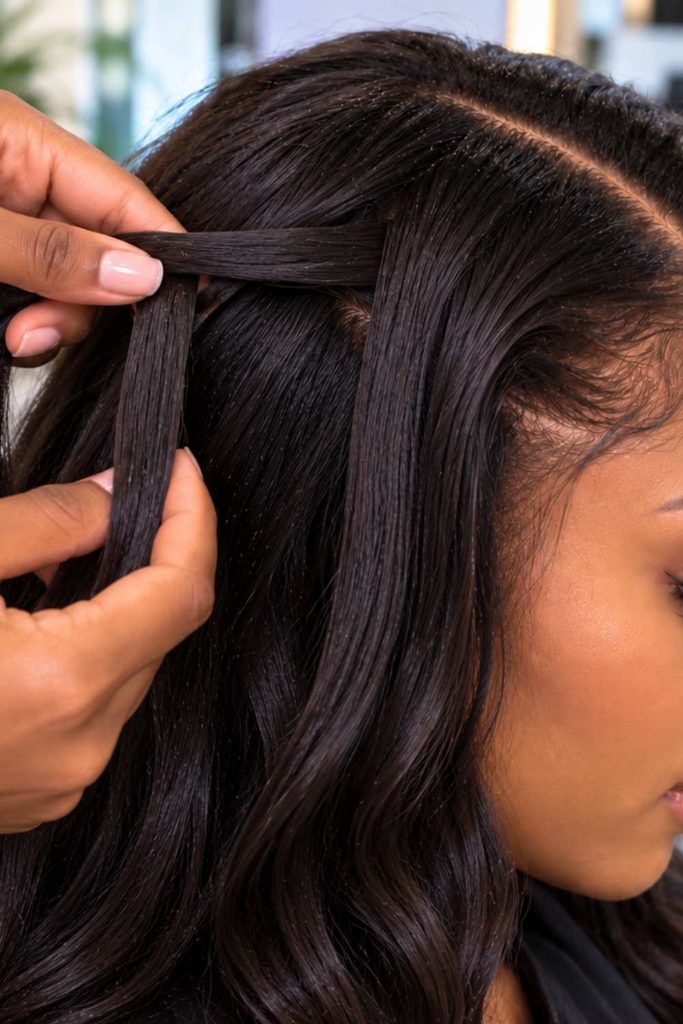
You’ve got your three sections ready, so now comes the fun part actually creating the braid! Take your time here because getting the first few crossings right will make the rest of the hairstyle much easier. You don’t need to rush or pull the hair tightly. The goal is to create a braid that looks soft, neat, and naturally flowing.
Cross the Top Section Over the Middle
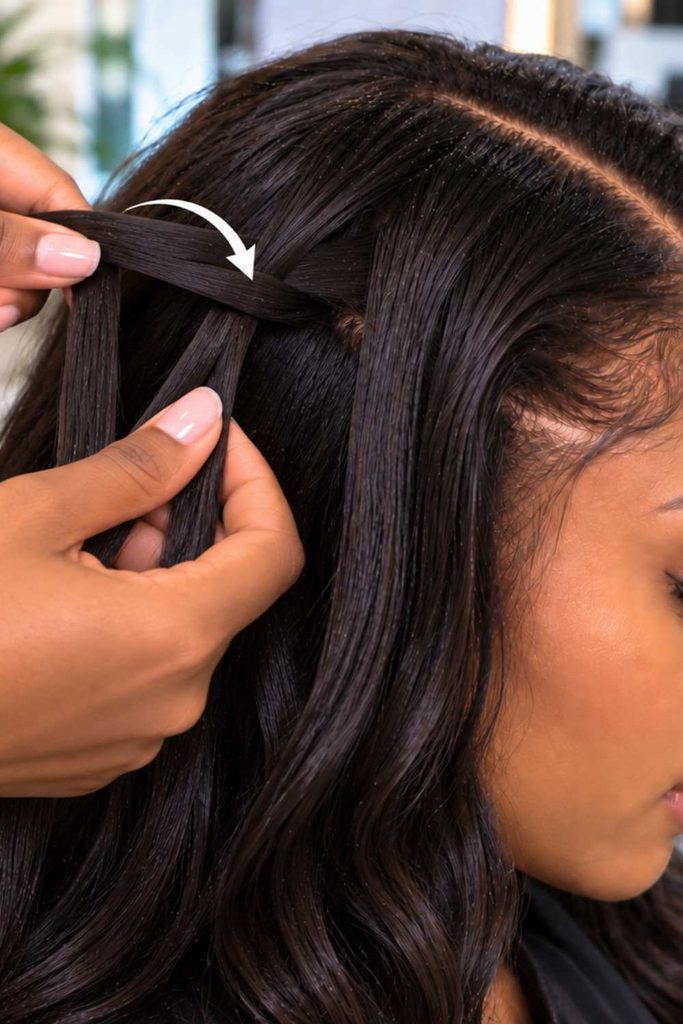
Start by taking the section of hair at the top and cross it over the middle section. Once you do this, the top piece becomes part of the middle of your braid. Keep your fingers close to your scalp as you work so the sections don’t get mixed up.
Don’t worry if it feels awkward at first. Waterfall braiding can take a little practice, especially when you’re trying to keep track of which section goes where. Just focus on one movement at a time when you create a waterfall braid hairstyle.
Cross the Bottom Section Over the Middle
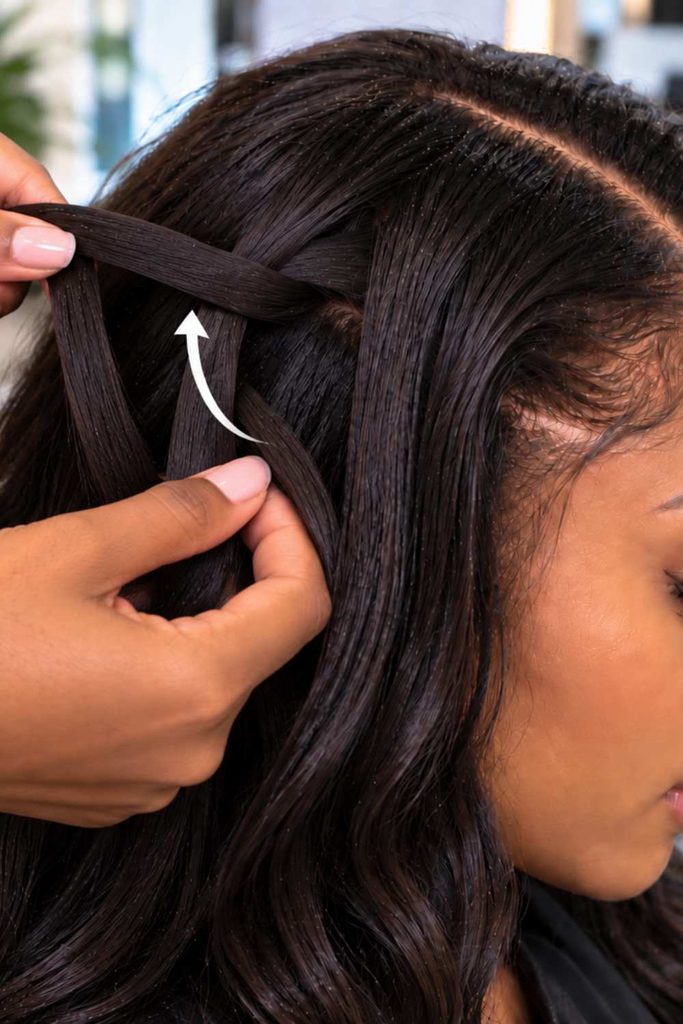
Next, take the bottom section and cross it over the new middle section. At this point, you should start seeing the familiar three-strand braid pattern forming.
Keep your movements gentle and controlled. If your hair starts slipping from your fingers, simply pause, separate the three sections again, and continue. There’s no need to start all over just because one section gets a little messy.
Keep the Braid Loose and Comfortable
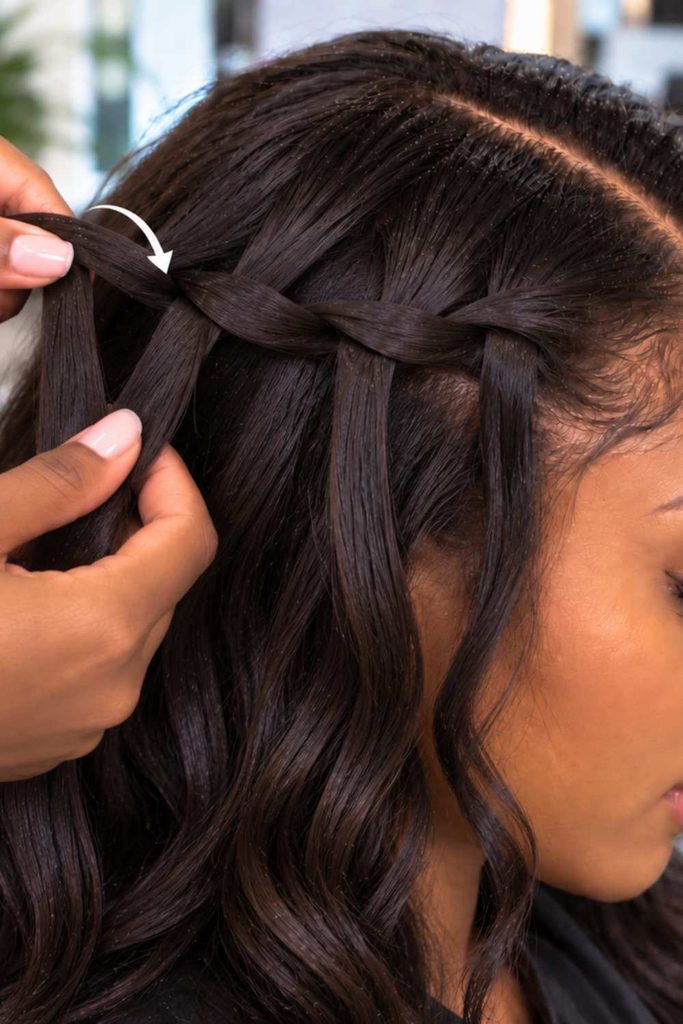
Here’s a little secret to getting that beautiful waterfall look: don’t braid too tightly! A tight braid can make the hairstyle look stiff and can also make it harder to create the soft cascading effect later.
Instead, keep a comfortable grip and allow the braid to sit naturally against your hair. You want it secure enough to stay in place but loose enough to look relaxed and romantic. As you continue, you can gently adjust the braid with your fingers to keep everything looking even, it is how to create a waterfall braid hairstyle.
Take Your Time With the First Few Crossings
The beginning is usually the part that requires the most concentration, so don’t feel bad if you need a few tries. Once your hands get used to the movement, the pattern will start to feel much more natural.
Think of it as a simple rhythm: top over middle, bottom over middle, and repeat. Soon, you’ll be ready to create a waterfall braid hairstyle and add technique that gives this hairstyle its gorgeous cascading effect.
Create the Waterfall Effect
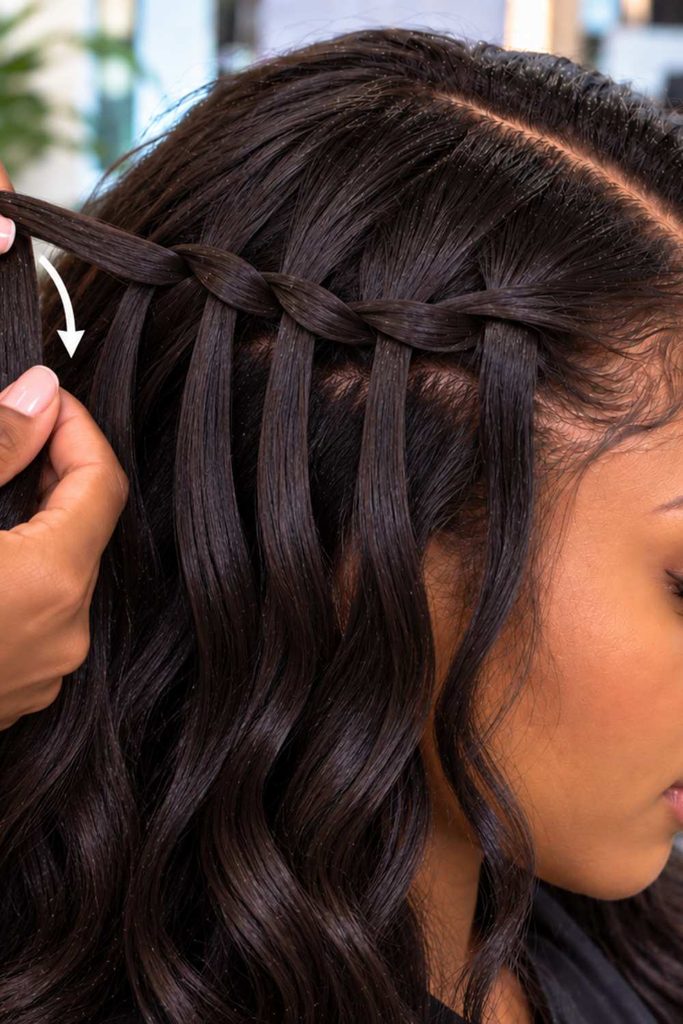
Now comes the part that gives this hairstyle its signature look the waterfall effect. This is where those gorgeous strands start falling through the braid, creating that soft, cascading appearance. It might feel a little tricky at first, but once you understand the pattern, it becomes much easier. The key is to remember one simple rule, drop one strand and replace it with a new one, so here, is the steps to follow to create a waterfall braid hairstyle.
Drop the Bottom Section
Once you have crossed the bottom section over the middle, don’t continue braiding it like you would with a regular braid. Instead, simply let that bottom section fall freely.
This loose strand is what creates the waterfall effect, so don’t worry about it looking unfinished. That’s exactly what you want! Allow the strand to hang naturally while you move on to the next step.
Pick Up a New Section From Underneath
After dropping the bottom strand, reach underneath the braid and pick up a new section of hair. Try to make this section roughly the same size as the strand you just dropped.
Bring the new section into the braid and continue weaving. Keeping your sections fairly even will help you create a waterfall braid hairstyle that look neat and balanced rather than uneven or bulky.
Repeat the Pattern Across Your Head
This is where the magic really starts to happen. Continue moving across your head by repeating the same simple pattern: braid, drop the bottom strand, pick up a new section from underneath, and braid again.
As you work your way across, you’ll notice the loose strands creating a beautiful cascading effect through the braid. Try not to pull everything too tightly. A slightly relaxed braid gives the hairstyle that soft, effortless look that makes a waterfall braid so pretty.
Continue Braiding Across Your Hair
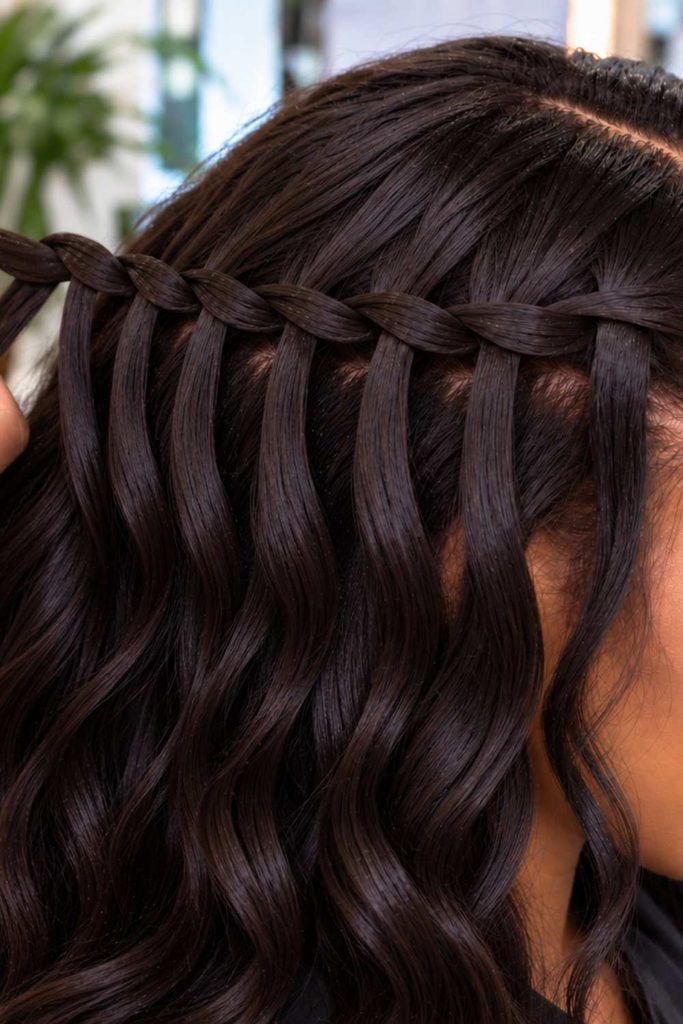
Now that you’ve got the waterfall effect going, it’s time to keep that beautiful pattern moving across your hair. This part is all about consistency. You don’t have to make every section perfectly identical, but keeping things fairly even will help your braid look polished and balanced. Take your time and let the hairstyle come together naturally, so you create a waterfall braid hairstyle that is stunning.
Keep the Sections as Even as Possible
As you continue braiding, try to pick up sections that are similar in size. If one section is much thicker than the next, the waterfall strands may look uneven and the braid can lose its shape.
Don’t stress about making every piece exactly the same, though. Your hair doesn’t have to be perfect for the braid to look beautiful. Just aim for a similar size as you work your way across, and gently smooth each section before adding it to the braid, you can create a waterfall braid hairstyle.
Maintain a Consistent Braid Pattern
Remember the pattern you started with? Keep repeating it as you move across your head. Braid the sections, drop the bottom strand, pick up a fresh section from underneath, and continue.
It may feel a little confusing in the beginning, especially if you’re braiding your own hair, but don’t rush. Once your hands get used to the movement, the pattern will start to feel much more natural. Every few sections, take a quick look in the mirror to make sure your braid is moving in the direction you want.
Avoid Pulling the Hair Too Tightly
Here’s a little secret to getting that soft, romantic waterfall look: don’t pull too tightly. A braid that is overly tight can make the style look stiff and can take away from those lovely cascading strands.
Secure the Braid
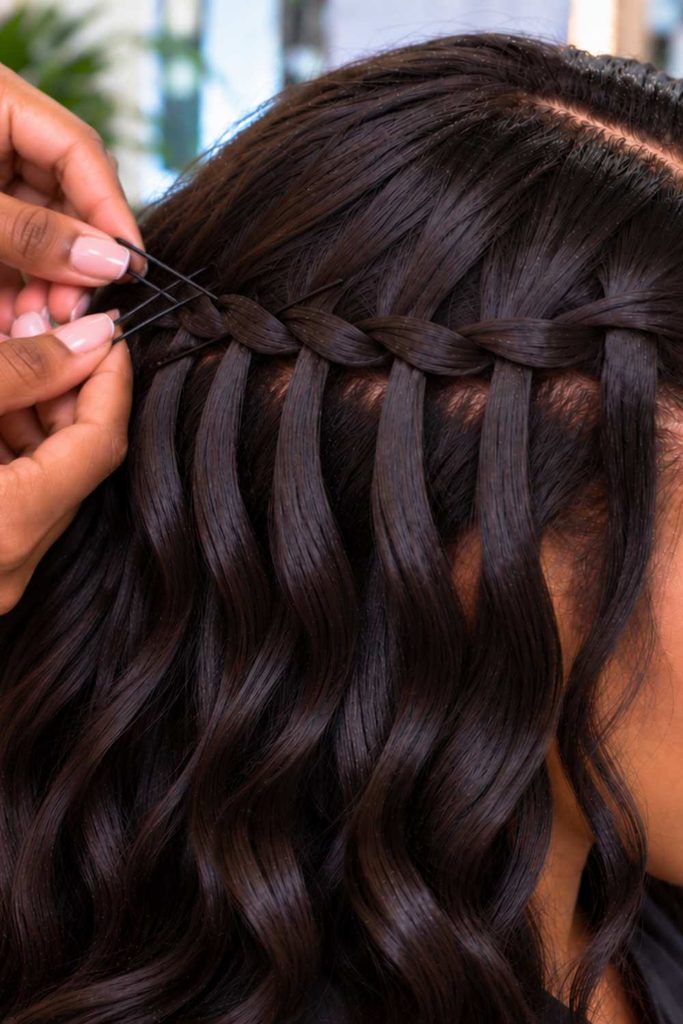
You’ve made it across your hair, and now it’s time to secure your beautiful waterfall braid. This step may be simple, but it makes a big difference because you want the braid to stay in place while still looking soft and effortless. The trick is to secure it neatly without making the elastic or pins too obvious.so to create a waterfall braid hairstyle is has a good finishing you have to
Finish the Braid Near the Opposite Side
Once you’ve reached the other side of your head, continue the braid for a little longer until you have enough length to secure it comfortably. You don’t need to braid all the way down to the ends of your hair. The goal is simply to create a neat finishing point that blends naturally with the rest of your hairstyle.
Take a moment to check your braid in the mirror. If any sections look loose or uneven, gently adjust them with your fingers before securing everything.
Read next: trendy fresh autumn(fall) hairstyle that looks good for the season
Secure It With a Small Elastic
When you’re happy with the braid, grab a small clear or matching hair elastic and carefully secure the end. Try not to pull the elastic too tightly, especially if you want to keep that soft and relaxed waterfall appearance.
A small elastic works best because it keeps the braid secure without becoming the main focus of your hairstyle. After all, we want people noticing those gorgeous cascading strands not the hair tie and create a waterfall braid hairstyle that is good.
Hide the End With Bobby Pins
If the end of the braid is visible, don’t worry you can easily tuck it away. Take one or two bobby pins and gently secure the braided end underneath a nearby section of hair.
Add the Finishing Touches
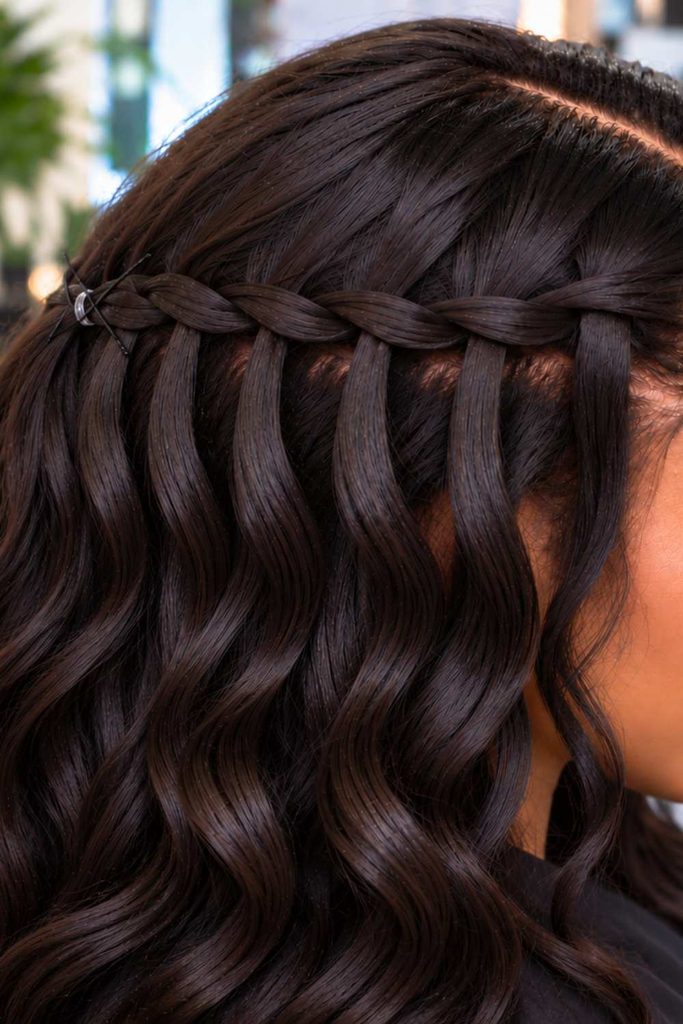
You’re almost there! Now it’s time to give your waterfall braid those little finishing touches that take it from simply done to soft, polished, and gorgeous. These final steps are all about adding a little volume, shaping the loose strands, and making sure everything looks neat without taking away from the effortless beauty of the style.
Start by gently loosening a few sections of the braid with your fingertips to create a little extra volume. Be careful not to pull too much, you only want to relax the braid slightly and give it a fuller appearance.
Next, give the loose waterfall strands some shape by curling or waving them. Soft waves can make the cascading pieces look even more romantic, while leaving them naturally straight creates a simpler, more effortless finish.
How to Make Your Waterfall Braid Look More Beautiful
To create a waterfall braid hairstyle is already a pretty idea, but a few small details can make it look even more gorgeous. You don’t need to do anything complicated. Sometimes, it’s the little adjustments that give your braid that soft, effortless finish that makes people stop and ask, “How did you do your hair?”
Keep the Braid Soft Rather Than Overly Tight
When you want to create a waterfall braid hairstyle, try not to pull each section too tightly. A soft, slightly relaxed braid gives the hairstyle a more natural and romantic appearance. It also allows the cascading strands to fall freely instead of looking stiff or squeezed together.
Make the Cascading Strands Similar in Size
For a neat and balanced waterfall effect, try to keep the strands you drop fairly similar in size. They don’t have to be perfectly identical, but avoiding extremely thin or thick pieces will help the braid look more polished.
As you work across your hair, take a quick glance at the loose strands from time to time. If one looks noticeably different, you can gently adjust it before continuing.
Add Loose Waves for a Romantic Appearance
Want to create a waterfall braid hairstyle that is a little extra charm? Add some loose waves to the cascading strands. Soft, relaxed waves create more movement and make the hairstyle look fuller and more romantic.
You don’t need tight curls. The goal is an effortless wave that blends beautifully with the braid and gives your hair that gorgeous, flowing finish.
Pull Out a Few Face-Framing Pieces
For an even softer look, gently pull out a few small pieces of hair around your face. These little strands can instantly make the hairstyle feel more relaxed and flattering.
Keep the pieces thin and natural-looking rather than pulling out too much hair. A few carefully placed strands are enough to frame your face without making the braid look messy.
Use Accessories Such as Small Clips, Pearls, or Flowers
If you’re creating your waterfall braid for a special occasion, why not add a little something extra? Small clips, delicate pearls, or tiny flowers can make the hairstyle feel more elegant without overpowering the braid.
Choose accessories that complement your outfit and the occasion. For a simple everyday look, a pretty clip may be all you need, while tiny flowers or pearls can give the braid a beautiful finishing touch for weddings, parties, or other special events.