There are days when my skin just doesn’t cooperate. A few dark spots here, a blemish there, and suddenly I’m standing in front of the mirror trying to figure out how to even everything out without piling on too much makeup. If you’ve ever had one of those days too, you’re definitely not alone.
That’s where full coverage makeup really comes in handy. Not to completely hide your skin, but to help even things out so you still look like yourself just a more smooth, polished version. The goal is always to feel confident in your skin, even when it’s not at its “perfect” best.
In this post, I’ll walk you through simple, realistic ways to cover dark spots and blemishes without that heavy, cakey feeling. Nothing complicated just easy steps that help your makeup look more natural, even, and put together while still keeping it comfortable on your skin.
Understanding Dark Spots and Blemishes
Before jumping into makeup techniques, it helps to understand what you’re actually trying to cover. Dark spots and blemishes are very common skin concerns, and almost everyone deals with them at some point. They don’t mean your skin is “bad” they’re just part of how skin heals and reacts.
What Causes Dark Spots?
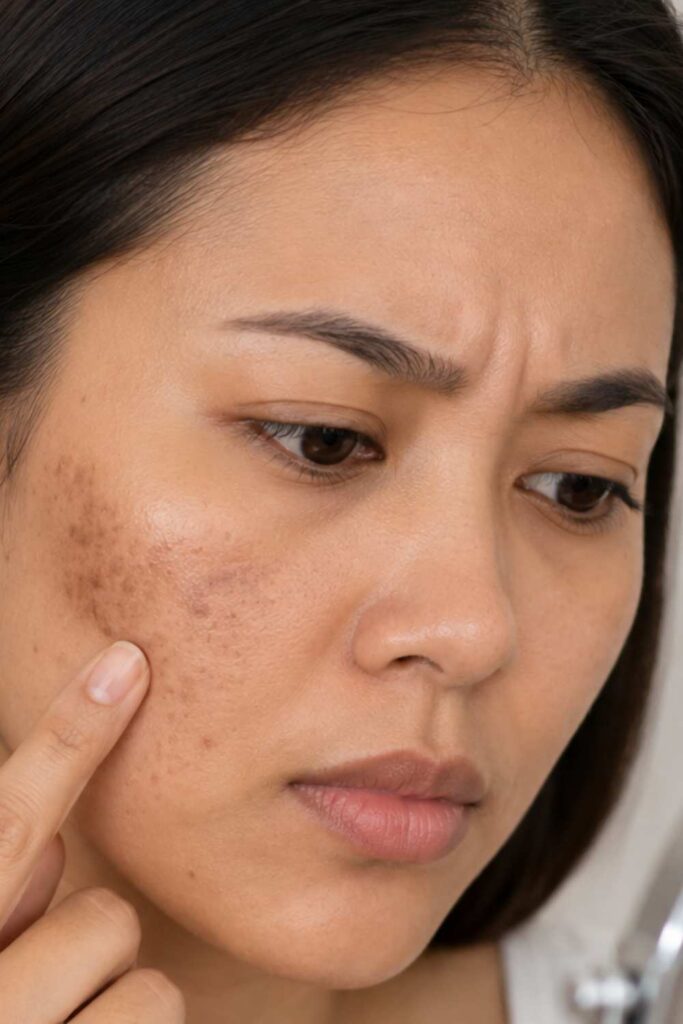
Dark spots can show up for a few different reasons. One of the most common is acne scars, which happen after pimples heal and leave behind marks on the skin. These marks can stay for a while, even after the breakout is gone.
Another cause is sun damage. When your skin is exposed to too much sun without protection, it can lead to uneven patches or darker areas over time.
You can also get dark spots from inflammation, which simply means your skin got irritated maybe from picking a pimple, a reaction, or even harsh skincare products. Your skin naturally tries to heal itself, but sometimes it leaves behind a mark while doing so.
Types of Blemishes: Active Pimples vs. Marks
It’s also important to know the difference between active blemishes and the marks they leave behind.
- Active pimples are the ones that are still forming or inflamed. They may be red, raised, or sometimes painful.
- Dark spots or marks are what remain after a pimple has healed. They are flat and usually darker than your normal skin tone.
This difference matters because you don’t treat or cover them the same way. Active pimples need gentle coverage, while dark spots usually need more targeted correction.
Why They Are Normal and Common
The most important thing to remember is this: dark spots and blemishes are completely normal. Almost everyone has them, whether they’re from breakouts, sun exposure, or just natural skin changes over time.
Social media often shows very smooth, filtered skin, but real skin has texture, marks, and changes and that’s okay. These things don’t take away from your beauty.
When you understand this, makeup becomes less about “hiding flaws” and more about evening out your skin so you feel confident and comfortable.
Skin Prep for Smooth Coverage
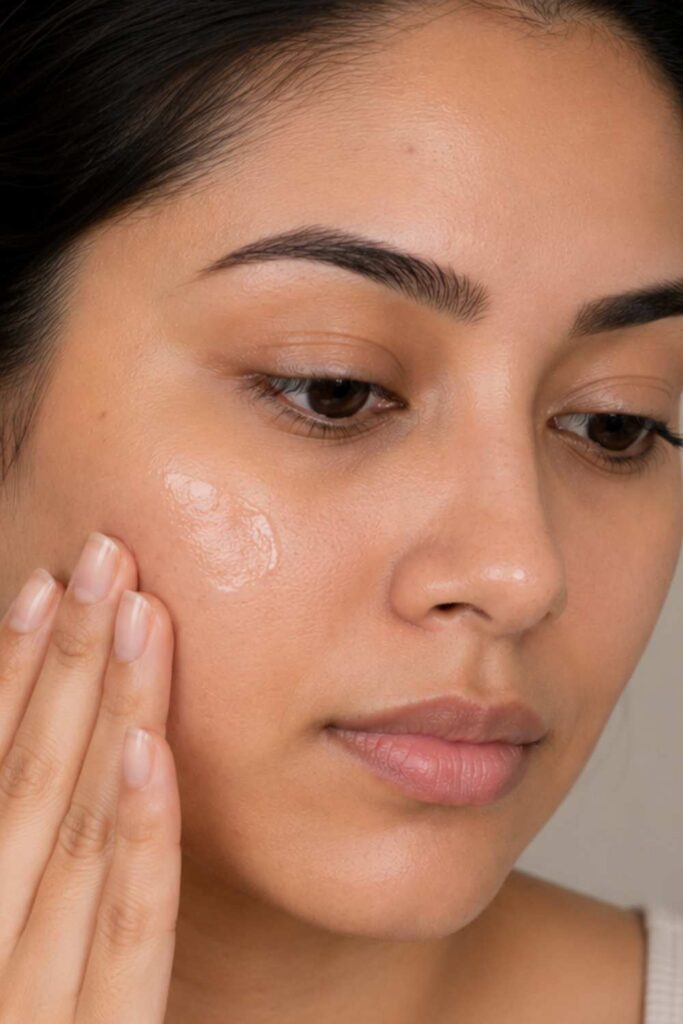
Before you even think about applying full coverage makeup, your skin prep really sets the tone. If your base isn’t smooth and well-prepped, no amount of foundation will sit nicely. This step might feel simple, but it makes a huge difference in how your makeup covers dark spots and blemishes.
Importance of Cleansing and Moisturizing

Start with a clean face. Cleansing removes oil, dirt, and leftover products that can make your makeup look patchy or uneven. When your skin is clean, foundation has a smoother surface to sit on, which already helps improve coverage.
After cleansing, don’t skip moisturizer. Moisturizing helps soften your skin and keeps it from looking dry or flaky under makeup. Even if you have oily skin, you still need hydration just use a lightweight moisturizer that won’t feel heavy.
Hydrated Skin ( Better Makeup Finish)
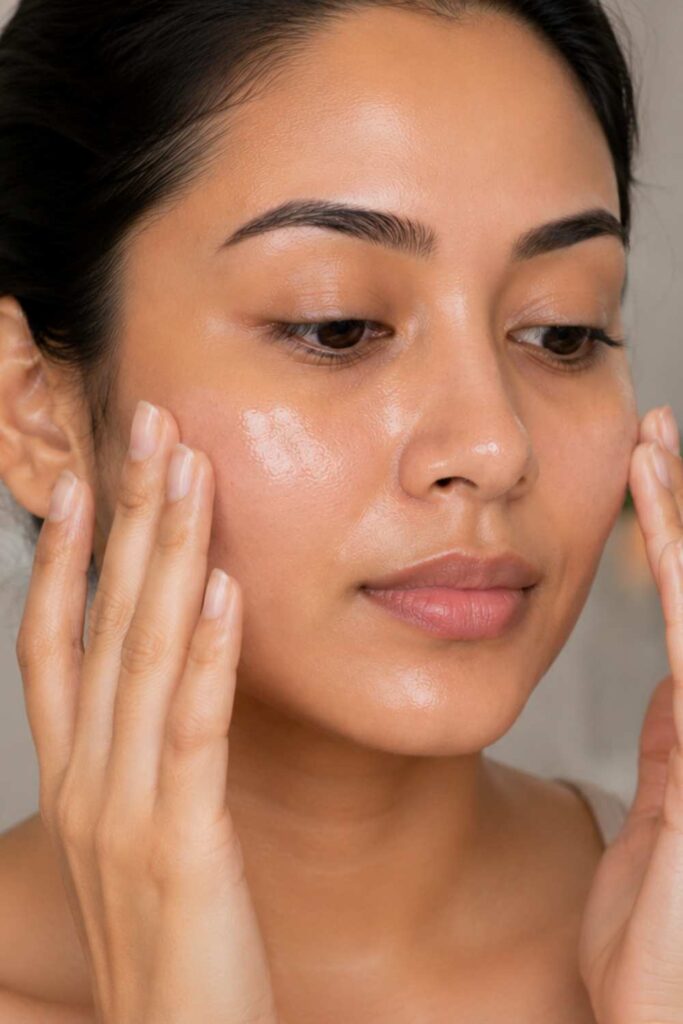
When your skin is well-hydrated, everything just works better. Foundation blends more easily, concealer doesn’t cling to dry patches, and your overall makeup looks more natural.
On the other hand, dry skin can make dark spots look more obvious because makeup tends to sit on top of the skin instead of blending in. Hydrated skin helps your full coverage makeup look smoother, softer, and more skin-like instead of heavy or cakey.
Using Primer to Smooth Texture and Improve Coverage
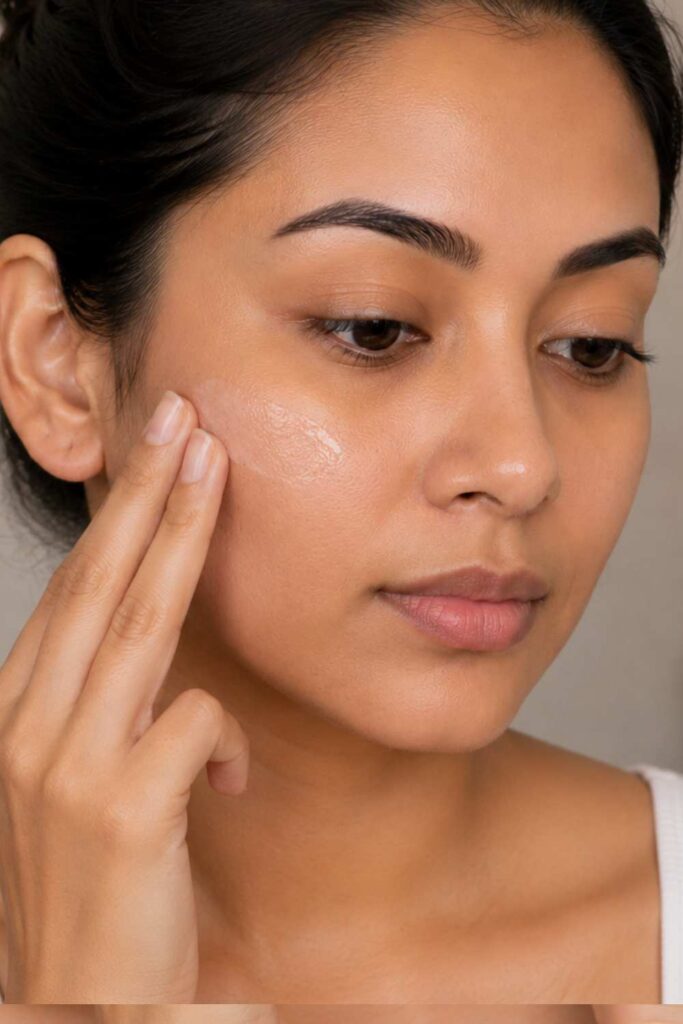
Primer is that extra step that helps everything come together. It creates a smooth surface for your foundation and helps blur out uneven texture, pores, and fine lines.
If you have oily areas, a mattifying primer can help control shine. If your skin feels dry, a hydrating primer adds extra moisture. And if texture is your main concern, pore-filling primers help smooth things out so your makeup applies more evenly.
Choosing the Right Full Coverage Foundation
When you’re trying to cover dark spots and blemishes, the foundation you choose really matters. Not all full coverage foundations are the same, and picking the right one can make your skin look smooth, even, and natural instead of heavy or mask-like.
Matte vs. Natural Finish Foundations
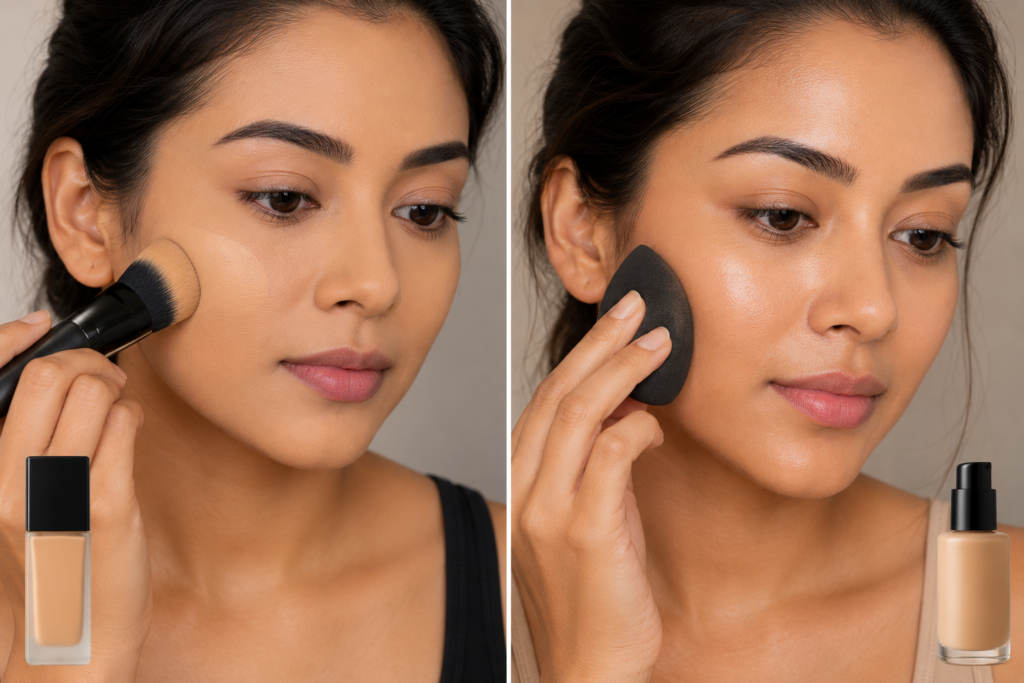
Full coverage foundations usually come in two popular finishes: matte and natural.
A matte foundation gives a smooth, shine-free look. It’s great if you have oily skin or if you want your makeup to stay in place for longer without looking greasy. It also helps dark spots look more even because it controls shine on the skin.
A natural finish foundation, on the other hand, gives a more skin-like glow. It doesn’t look too flat or too shiny it sits somewhere in between. This is a good choice if you want coverage but still want your skin to look fresh and real.
Importance of Shade Matching
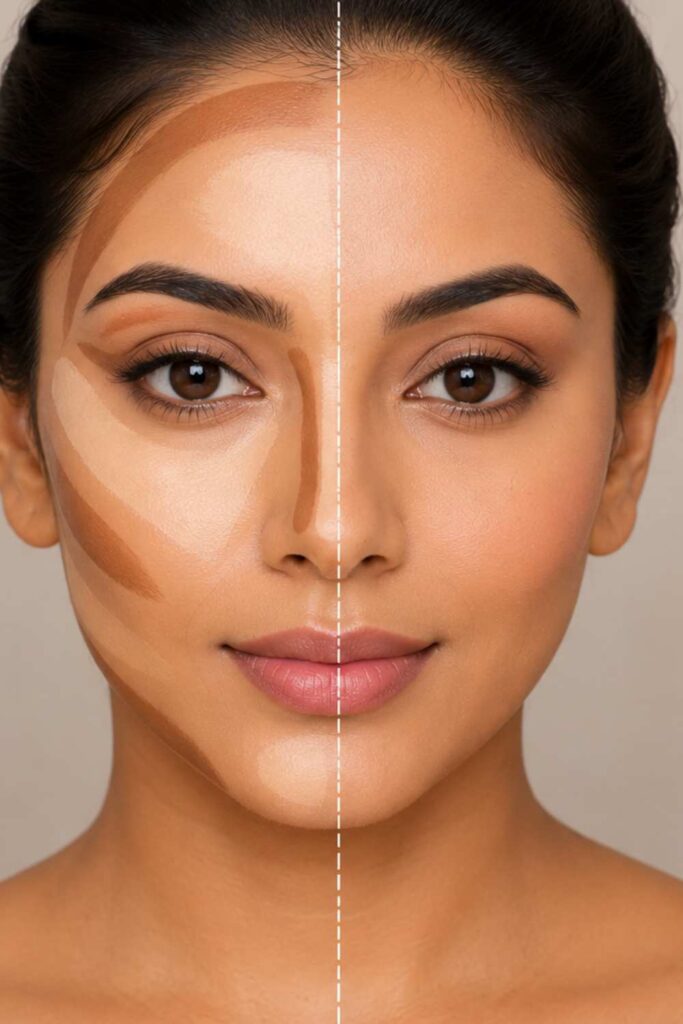
One of the most important steps in choosing a full coverage foundation is getting the right shade. If your foundation is too light or too dark, it can actually make dark spots stand out more instead of hiding them.
The best way to check is to test the foundation along your jawline and see how well it blends into your neck. If it disappears into your skin, that’s a good match.
Buildable Full Coverage Formulas
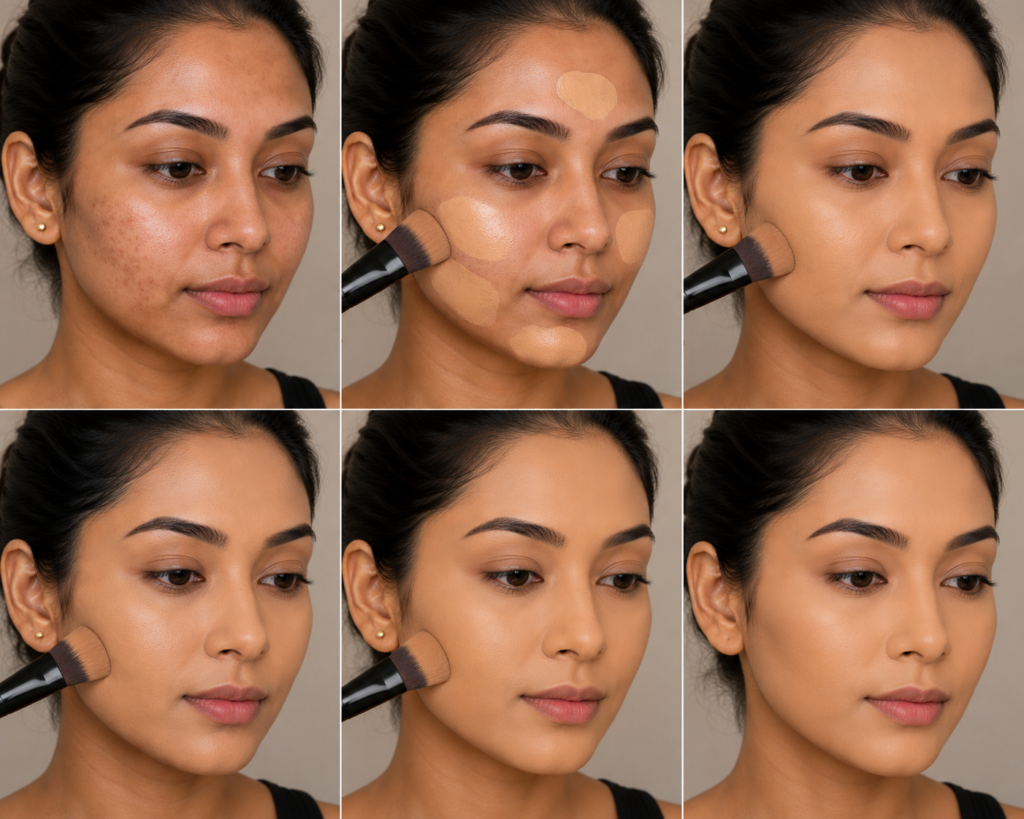
Not all full coverage foundations need to feel heavy. The best ones are buildable, meaning you can start with a light layer and add more only where needed.
This is actually the secret to making your makeup look smooth instead of cakey. Instead of applying a thick layer all over your face, you can build coverage slowly over dark spots and blemishes while keeping the rest of your skin light.
Color Correction (Secret Step for Dark Spots)
If you’ve ever struggled with dark spots or redness still showing through your foundation, even after applying full coverage, then color correction might be the missing step in your routine. It’s like a little “secret trick” that helps your makeup look smoother and more even before you even apply foundation.
Explore also: Minimal makeup look for natural beauty lovers
Using Orange/Peach Correctors for Dark Spots
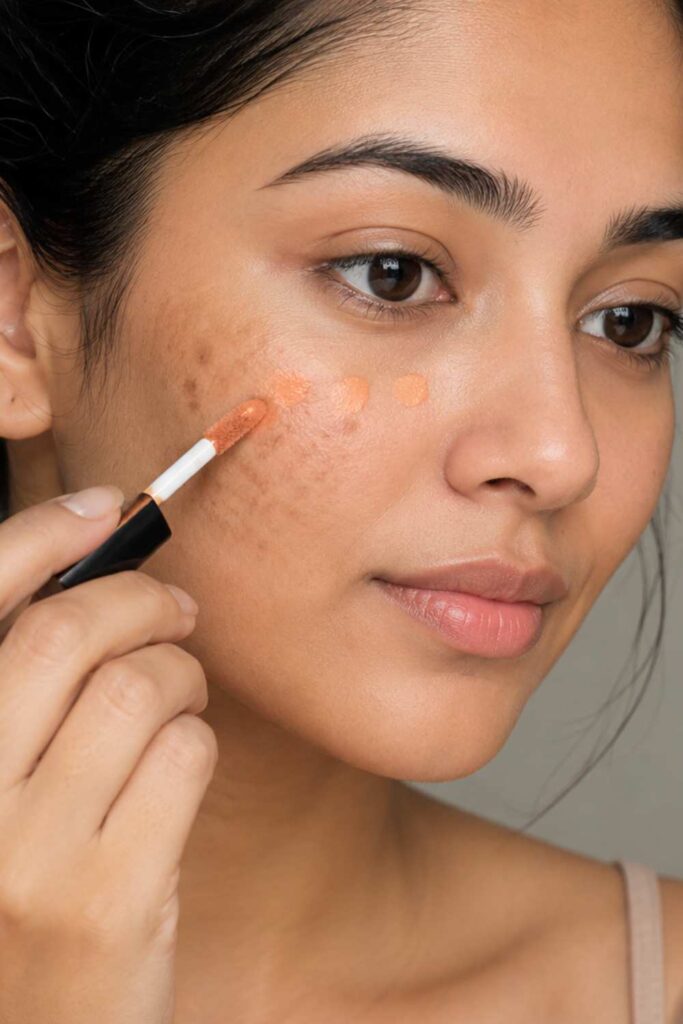
Orange or peach correctors are great for covering dark spots, especially on deeper skin tones. They work by neutralizing the darkness underneath, so your foundation doesn’t have to do all the work.
Instead of piling on more foundation, you simply apply a small amount of corrector directly on the dark spot and gently blend it out. It should look soft, not heavy. Once you apply your foundation over it, the dark areas appear much more even and less noticeable.
Green Corrector for Redness
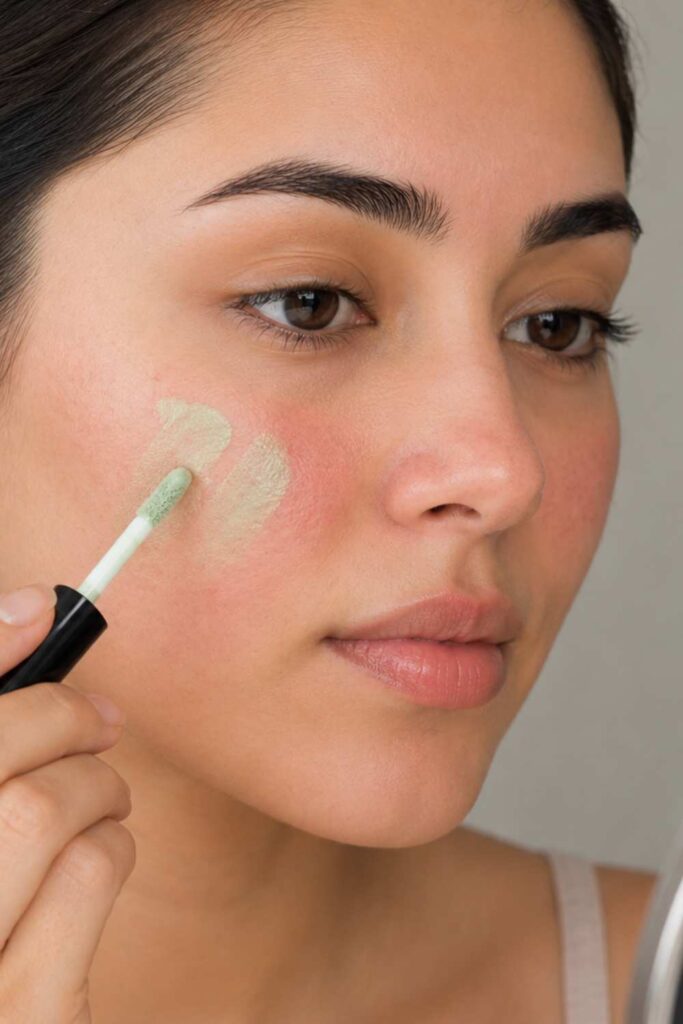
If you struggle with redness like active pimples, irritation, or blotchy areas a green corrector is your best friend. Green helps neutralize red tones in the skin.
Just like with orange corrector, you only need a tiny amount. Dab it lightly on the red areas and blend carefully so it doesn’t look too obvious. When you apply foundation on top, the redness looks much softer and more balanced.
How Color Correction Improves Your Final Look
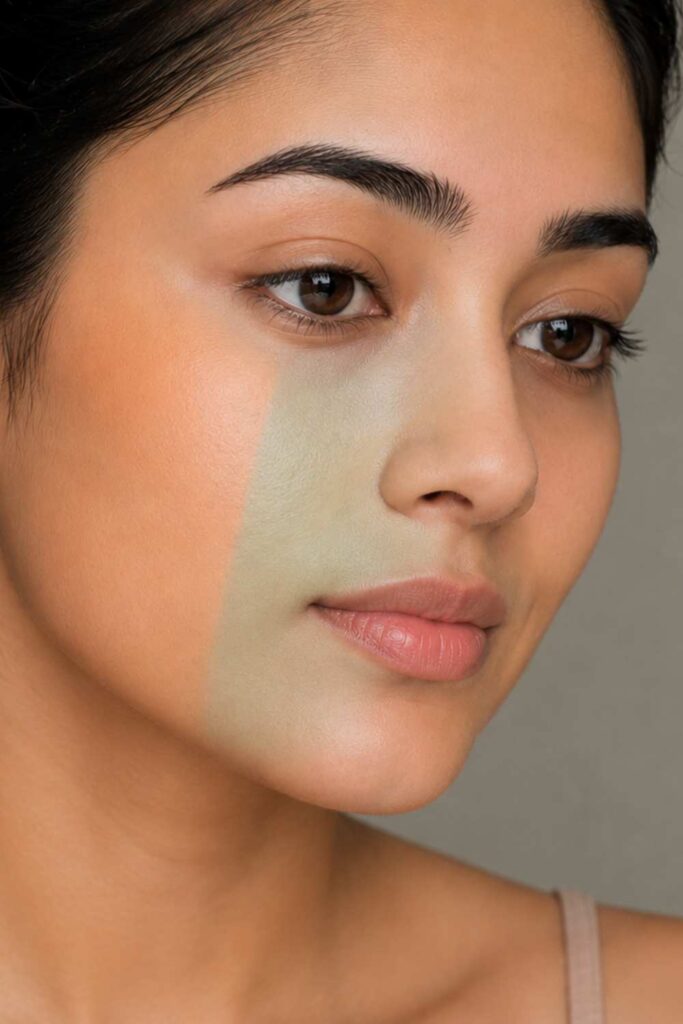
Color correction might seem like an extra step, but it actually makes a big difference in how your full coverage makeup turns out.
Instead of using a lot of foundation to hide dark spots and blemishes, color correctors do part of the work for you. This means your foundation can go on lighter, blend better, and still give you a smooth, even finish.
Applying Foundation for Full Coverage
When it comes to getting a smooth, even base, especially for covering dark spots and blemishes, how you apply your foundation matters just as much as the product itself. The goal is not to pile on product, but to build a clean, even layer that still looks like skin.
Using Thin Layers Instead of Thick Application
One of the biggest mistakes with full coverage makeup is applying too much foundation at once. It might seem like more product will cover everything faster, but it usually does the opposite, it can look heavy, cakey, and unnatural.
Instead, start with a thin layer. Let it sit on your skin and see how it looks before adding more. This way, you have more control over the finish, and your makeup looks smoother and more natural.
Thin layers also help your foundation blend better into your skin, giving you that soft, even look instead of a thick mask-like finish.
Blending Techniques (Sponge vs. Brush)
Blending is where everything comes together, and the tool you use can change your final result.
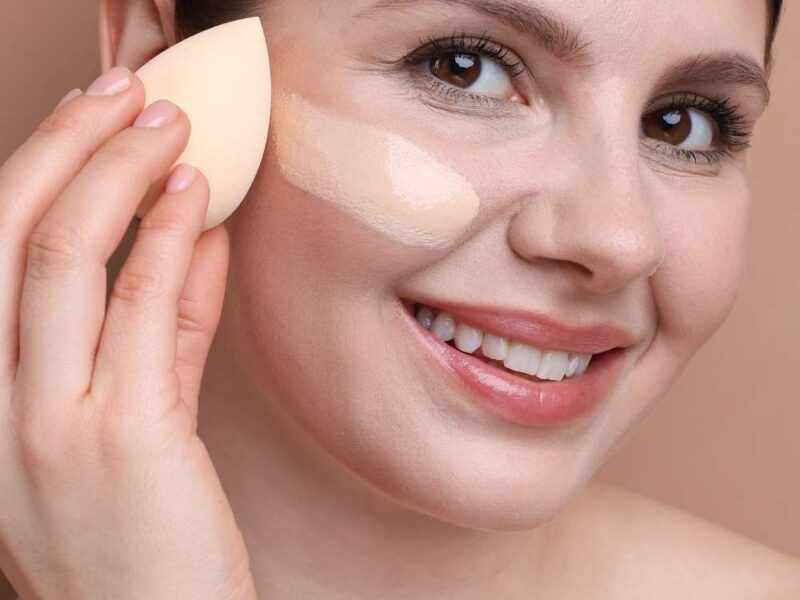
A makeup sponge gives a more natural, skin-like finish. When it’s slightly damp, it presses the foundation into your skin instead of just sitting on top. This helps blur dark spots and makes everything look seamless.
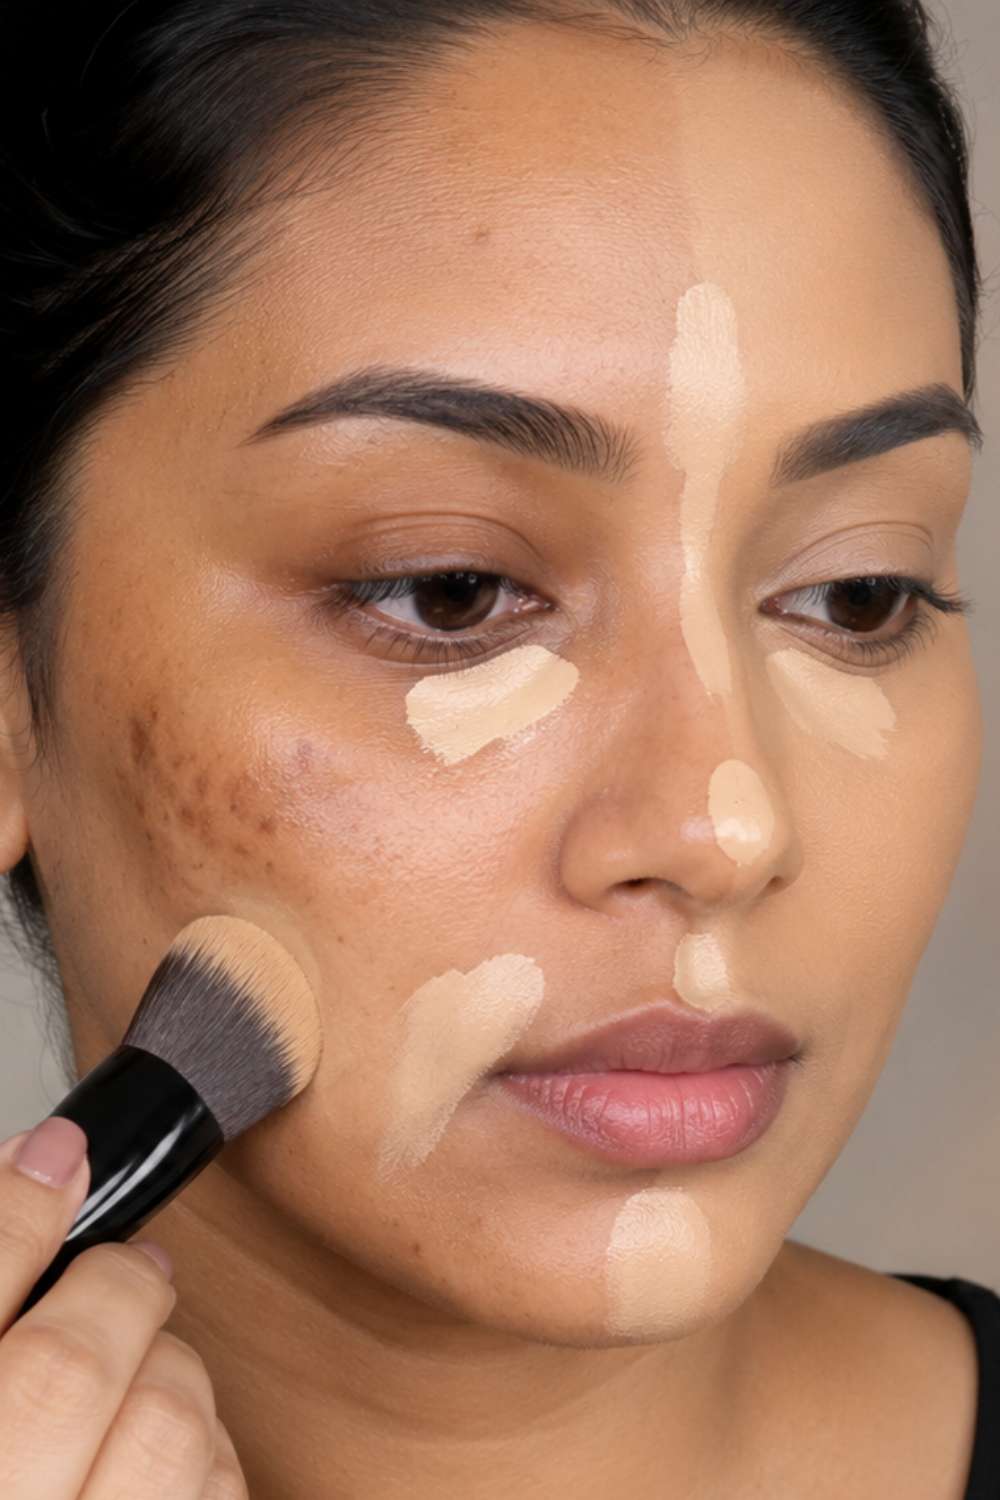
A foundation brush gives more coverage and a more polished finish. It helps spread product evenly and is great if you want a slightly more perfected look. Just make sure you blend well to avoid streaks.
Building Coverage Where Needed Only
You don’t need the same amount of foundation on every part of your face. Some areas may need more coverage, while others don’t need much at all.
Start by applying a light layer all over your face, then go back and add extra product only on areas like dark spots, blemishes, or redness. This is called spot layering, and it helps your skin still look natural while giving you the coverage you need.
Concealing Dark Spots and Blemishes
Even with a good foundation, some dark spots and blemishes may still need a little extra attention. That’s where concealer comes in. The key is not to overdo it, but to use it smartly so your skin still looks natural and smooth.
Spot Concealing Technique
Spot concealing simply means applying concealer only on the areas that need it, instead of covering your whole face again.
Take a small amount of concealer and gently dab it directly on dark spots, blemishes, or marks. Then blend only the edges so the product melts into your skin. Try not to rub too much, because that can move the product around and reduce coverage.
Difference Between Foundation and Concealer Use
Foundation and concealer work together, but they have different jobs.
Foundation is used to even out your overall skin tone and create a smooth base across your whole face. Concealer is more concentrated and is used for targeted areas that need extra coverage, like dark spots, pimples, or under-eye circles.
How to Layer Concealer Properly
Layering concealer the right way is very important if you want a smooth finish.
Start with a small amount less is always better. Apply it only where needed, then gently blend it into the skin. If you still see the spot underneath, you can add a very thin second layer instead of applying too much at once.
After blending, let it sit for a few seconds before setting it with powder. This helps it stay in place and prevents creasing throughout the day.
Setting Your Makeup for Long Wear
Once you’ve applied your foundation and concealer, the next important step is setting everything in place. This is what helps your makeup stay smooth, fresh, and long-lasting throughout the day, especially when you’re wearing full coverage to hide dark spots and blemishes.
Setting Powder to Lock Coverage
Setting powder helps “lock in” your makeup so it doesn’t move around or crease. After applying foundation and concealer, lightly dust powder over areas that tend to get oily, like your T-zone (forehead, nose, and chin).
You don’t need to use too much just a light layer is enough. Pressing the powder in gently with a brush or sponge helps your makeup stay in place while still looking soft and natural. This step is key for keeping your base looking smooth and not shiny.
Baking (Optional Technique)
Baking is a technique where you apply a bit more powder under the eyes or on areas you want extra brightness, then let it sit for a few minutes before brushing it off.
It helps set your concealer more strongly and can give a very smooth, matte finish. However, it’s optional not everyone needs it. If you have dry skin or prefer a more natural look, you can skip baking and just use a light dusting of powder instead.
Setting Spray for a Natural Finish
After powder, setting spray is the final step that brings everything together. It helps melt all the layers of makeup into the skin so it doesn’t look too powdery or heavy.
A few spritzes of setting spray can also make your makeup last longer and give your skin a more natural, skin-like finish. It’s especially helpful if you want your full coverage makeup to still look soft and fresh instead of flat.
Keeping It Natural, Not Cakey
When doing full coverage makeup, especially for dark spots and blemishes, it’s very easy to go overboard. You want coverage, yes but you also want your skin to still look like skin. The goal is a smooth, even finish that doesn’t feel heavy or look cakey.
Avoiding Too Much Product
One of the main reasons makeup looks cakey is simply using too much product. It can be tempting to keep adding more foundation or concealer to fully hide everything, but this often builds up on the skin and makes texture more obvious.
Instead, start light and build slowly. Apply a thin layer first, then only add more where you truly need it. Most of the time, less product gives a more natural and polished result, especially for a soft flawless foundation look.
Blending Properly into Skin
Blending is everything when it comes to keeping your makeup natural. Even full coverage makeup can look smooth if it’s blended well into the skin.
Take your time to blend around areas like your jawline, nose, and under the eyes so there are no harsh lines or visible edges. Whether you’re using a sponge or brush, gentle blending helps the product melt into your skin instead of sitting on top of it.
Letting Skin Texture Still Show
It’s important to remember that real skin has texture and that’s completely normal. You don’t need to erase every line, pore, or natural detail to look beautiful. Trying to cover everything completely can actually make makeup look less natural.